Monday, February 19, 2018

Packing up and Moving House

Hello,
This is a short post letting you know I am taking a break from my blog for a short while.
For around 18 months I have been looking for a new home and a few weeks ago I found one I
love and was fortunate enough to purchase.

Now all my time is spent preparing my current home for sale. I have been packing for a
week and can only just see some empty spaces. Heaps more to still pack. Twenty five years in the
one place one accumulates a lot of stuff.

I shall be back to beading and sharing in the not too distant future.    Happy Beading!!!


Here are pics of the new home and my future living area and pool. I have never had a pool before so it may get turned into a fish pond....LOL


Saturday, December 9, 2017

Seasons Tea Light


Here is my latest design for Christmas -  my "Seasons Tea Light".

A last minute present for someone and still plenty of time to make before Christmas.

Made to fit most votive candles or just pop in a tea light.

I hope you like it and if you do just click on the image.


Wednesday, December 6, 2017

The "Thorny Little Devil" jar


A lot has been happening lately and I have been pretty busy. It has taken me awhile to show my newest beaded jar. After I finished my 'Little Night Music' jar I went straight into making a second one. This time I wanted to cover the entire jar in beaded spikes. I also wanted a mono-chromatic palette.

I did three different lids for this jar. I beaded a tall decoration on top, which made me feel it needed a shorter, broader lid. I then beaded a different rivoli on top and thought it to be too busy and detracted from the overall look of the jar.
Hunting through my stash I found a large mirror disc that enabled me to get the mathematics to match up between bezel and lid top. I am very happy with how I attached the bezelled mirror and then embellished the top with silver cabochons, finishing by beading more peyote to make the join look seemless. I learnt a lot.

So here you have a video of the design which I decided I would call my "Thorny Little Devil"

I have been asked how long it takes me to bead the jars. I cannot answer as I don't keep track of the time when beading. So much gets beaded then you have to figure out another step and sometimes the
count doesn't work or you don't like what you did and you need to pull back and start again.

Taking note of all the time it takes is distracting. I just like to focus and bead until it is to my satisfaction.

Now I have completed this design I have the mathematics and the pattern to go by, therefore I could estimate I would take about 15-16 hours to bead this jar again.

I hope you enjoy my little beaded jar.

Friday, December 1, 2017

KingStar Tutorial finally released

Twelve months ago I released my KingStar Kit. I still have limited numbers of kits available in USA and in Australia. Click on the image above for a link.


 Today I listed the TUTORIAL for sale also. The Tutorial includes instructions on how to make the
Silver and White KingStar as well as the coloured KingStar below. Kind of a TWO-FOR-ONE deal.
Click on the coloured star below for the link.

Sunday, October 29, 2017

A Little Night Music


As some of you are aware I am a member of the Macarthur Bead Society. Once a month we meet and each month the facilitator sets a challenge to be done by the next meeting.

The October challenge was to be "Kinetic" - which I interpret to mean some part of the design needs to have a moving part or parts. You can make the challenge in whatever medium you wish and however you want it to be. There is no pressure and you do not have to participate if you don't wish.

I have been really enjoying the challenges lately and couldn't wait to do the next.

Here is my design for the month and I call this
"A Little Night Music" - all is explained in the video.

Saturday, October 21, 2017

Venetian Mirrors tutorial now released


I have always loved looking at "Venetian Mirrors". Whenever I pass a store that has one of these mirrors I stop and admire the sparkle, the catching of light, the etching and various layers of the mirror. I have promised myself to one day buy one for my home.


In 2012 I sat down with some Swarovski crystal rivolis, bicones, some Fancy Stones in settings with nickel seed beads and attempted to design something along the lines of a Venetian Mirror.


Above and to the left is my first attempt. This certainly captured that level of sparkle and when I showed it on media I received heaps of interest, with many ladies wanting the pattern.
Unfortunately I wasn't writing tutorials then and it was way beyond my capabilities to do so.

In 2016 I was asked to teach the bracelet, but I knew it needed to be streamlined and made easier for teaching and easier for me to write the tutorial.


So below you have the revised version. Less work in the centrepiece but the rest of the components remained the same.
I added some CRAW for attaching the clasp which also allowed for varying the measurement for the fuller figured woman.

So five years from conception to final release of my "Venetian Mirrors" tutorial.

Just click on the link below if you are wanting to make one of these eye-catching bracelets. You will need your sunglasses when you show this around.

https://www.artfire.com/ext/shop/product_view/patrickduggandesigns/13881174/


Sunday, September 3, 2017

New Inspiration leads to new designs

As I mentioned in the last post I am a member of the Macarthur Bead Society. Each month we meet and each month a beading challenge is set. 
The challenge for June was Op Art - see previous post.
The challenge for July was "Around the Spire".
These challenges can be interpreted in any way you wish in whatever medium you choose.

I was somewhat baffled how to interpret this challenge, my immediate thought was a pointed 
tower and that meant spikes. I sat and played, capturing a spike and decorated the outer edges - hmmmm... not what I wanted so my first attempt was pulled apart - sorry no images. 

That evening I sat to watch my favourite TV series A Game of Thrones - or GOT to those avid followers. In the opening credits they show an aerial view of what look like medieval castle towers, rising up out of the earth. I immediately thought - THERE is my inspiration.

I wanted to capture the look of a tall tower coming to a point and include various turrets and buttresses if possible. Since I was working in beads I thought I would attempt to also make the 'Tower' into wearable jewellery.

Engineering the three dimensional, architectural structure took some pondering but I managed to get what I was looking for.

To the right is my first attempt.  Tower#1
I had so much fun figuring out how to make what look like turrets and how to taper the tower so that when it is held up it is wide at the base and tapers to a point. 
Since the spike was the point the structure had to point downwards for aesthetics as jewellery.

The base of the 'Tower' then had to be finished so I added a Swarovski rivoli. 

Placing a rivoli at the other end - top -  made me very happy.   I have often thought all the sparkley bits in jewellery are often pointed at the viewer. 
Having the tower top decorated with a rivoli made the sparkles point at the wearer. That was a big plus in my eyes. 

When I finished this Tower #1 I added a length of chain - enough to go over the head, so no clasp - and naturally I put on my new creation. 
I have a large belly, the Tower turrets sat on my belly, when I moved the Tower rapidly rolled from side to side. That is not good!!! Someone could lose an eye with all this propulsion!!

So my next question was - how do I get this new design to lay flat?
Add caption

On the left is my second attempt. I removed a turret point giving me a 'flat' area, which by rights should allow Tower #2 to lay flat on the wearer.  

When I placed the new piece on myself - it worked!! - no belly rolls.  YAY!!!!!


Happily I took my two new creations to the society meeting, I proudly placed them on the table when we were having our show and tell and I received some lovely oohs and aaahs !!
I was pleased.

I asked one of the ladies to put on Tower #1 as I wanted to see how it sat on a woman's body.

I then realised that because women have their own 'turrets' my little Tower sat perfectly just under the bust. 
There were no belly rolls because all the points were not touching anything.  

Sheeesh....Tower #2 was unnecessary!!! but I am glad I had a variation.

I have since created Tower #3 - alongside - and I really had fun with colours, embellishment and shapes.

Making these pieces has captured my imagination. I am loving the three dimensional look of them.
I have a myriad of ideas forming in my mind. There will be more.

I have been asked for a tutorial and shall begin writing soon.

Stay tuned for the release of my 

"Tower Spire" pendant tutorial


Tuesday, August 1, 2017

I have another go at Embroidery

For most of this year I have hardly done any beading. No desire at all and surprisingly I didn't miss it.

I was concerned for awhile as normally I wake early and spend 3-4 hours a day experimenting. 
I just didn't have the verve for it. My focus had shifted elsewhere. 

Six months into the year I was thinking maybe I should try my hand at embroidery.
You see I am inspired by the two 'Reginas' - Regina Krawets and Regina Payne.

Having bead embroidered once before I was beginning to think doing another might 'kick-start' 
my beading desire again, problem was I didn't know what I wanted to embroider. 
When you have a blank canvas in front of you the possibilities are enormous AND very daunting. 
So not knowing what I wanted to create, I created nothing - until last month.

I am a member of the Macarthur Bead Society. We meet every third Saturday of the month and each meeting the facilitator - Neva Brown - comes up with a Bead Challenge. 
The challenge for the June bead meeting was "POP Art"

I immediately thought of Andy Warhol, Campbell Soup tins, Wham! Bam! Kapow! etc etc.
I had my embroidery subject, I would try to embroider a "POW !"
That wouldn't be too hard and hopefully would be good fun.

I start by creating the letters in a cubic right angle weave (CRAW) and decided to include an oval Lunasoft cabachon for the letter 'O'. That gave me the size of the lettering. 
  
Whilst making the challenge my thoughts went to "what will I do with this when finished?"
Can I make this into a necklace - isn't there enough jewellery.
I could sew it to a baseball cap - I would never wear it.
I could sew it on a denim jacket - I am too old to wear a 'noisy' kind of jacket.
I could give it to a grand niece of mine to sew on clothing for her young daughter - hmmm......the embroidery would eventually be thrown away. I didn't like that idea!

So, here you have my finished embroidery. 
I glued the work to one of the bead boards I use when travelling. Now I get to see and enjoy it.

The embroidery is a bit 'rough' in my opinion.
I used some beads I wanted to get rid of, and they were not all that even. Some of the beads sit up higher - that may be over-crowding the beads or my tension.
When glueing down the 'O' ring around the cabochon, the CRAW twisted a little so I wasn't able to further surround the cab.

I have three friends who embroider and they have critiqued the workmanship and made suggestions on what to do next time. All things I will keep in mind for future. 


 I learnt a lot from doing this piece and shall do more in future.  
I like the idea of combining bead-weaving and bead embroidery.

Has it kick-started my beading again??  Yes it has.


Tuesday, June 27, 2017

"Ananas" - tutorial now released


Announcing the release of the tutorial for my "Ananas" necklace.

This is the largest tutorial I have so far written - 30 pages with 115 full colour illustrations.

I designed Ananas last year for teaching at Beads by Blanche, New York and it is the second of four designs all made for that teaching gig.

The shapes in the rope remind me of pineapple skin thus the name Ananas.

I hope you enjoy "Ananas"

Monday, April 17, 2017

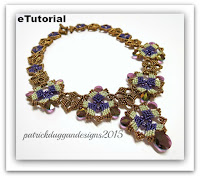
"Pansyface" - tutorial now released

In March 2016, I shared images of my "Pansyface" necklace
 - one of the four classes I was to teach at Beads by Blanche, New York, in June 2016.

Today I am showing the necklace again as I have released the tutorial from my teaching portfolio.

 So if you are interested in making "Pansyface" - a two sided (reversible) necklace
just click on the large image below or on my Artfire link on the right hand side of my blog.